Store Development Installation
This setup details a local development installation in order to work and test App Store changes. The App Store is build using Django. The frontend is written in TypeScript and does not yet use a JavaScript framework; this decision might change however depending on how JavaScript intensive things might become.
Note
Only use this guide for your local development installation which is not connected to the Internet since your installation will be be initialized with insecure defaults!
Installing Packages
First you want to switch your machine to an up to date Node.js version and install Yarn:
curl -sS https://deb.nodesource.com/gpgkey/nodesource.gpg.key | sudo apt-key add -
echo "deb https://deb.nodesource.com/node_8.x xenial main" | sudo tee /etc/apt/sources.list.d/nodesource.list
echo "deb-src https://deb.nodesource.com/node_8.x xenial main" | sudo tee -a /etc/apt/sources.list.d/nodesource.list

curl -sS https://dl.yarnpkg.com/debian/pubkey.gpg | sudo apt-key add -
echo "deb https://dl.yarnpkg.com/debian/ stable main" | sudo tee /etc/apt/sources.list.d/yarn.list
Then install the following libraries:
sudo apt-get update
sudo apt-get install python3-venv python3-wheel libxslt-dev libxml2-dev libz-dev libpq-dev build-essential python3-dev python3-setuptools git gettext libssl-dev libffi-dev nodejs yarn
Finally download the latest geckodriver and install it (adjust URLs/package names if needed):
wget https://github.com/mozilla/geckodriver/releases/download/v0.21.0/geckodriver-v0.21.0-linux64.tar.gz
sudo sh -c 'tar -x geckodriver -zf geckodriver-v0.21.0-linux64.tar.gz -O > /usr/bin/geckodriver'
sudo chmod +x /usr/bin/geckodriver
rm geckodriver-v0.21.0-linux64.tar.gz
Download the Source
Clone the repository using git and change into it:
git clone https://github.com/nextcloud/appstore.git
cd appstore
Install poetry
Install poetry to handle python dependencies:
pip install poetry==1.8.2
App Store Setup
The project root contains a Makefile which allows you to quickly set everything up by running:
make dev-setup
This will automatically set up the web app using venv, SQLite as database and create a default development settings file in nextcloudappstore/settings/development.py. You need to review the development settings and change them according to your setup. An admin user with name admin and password admin will also be created.
Launching the Development Server
The server can be started after activating the virtual environment first:
poetry shell
export DJANGO_SETTINGS_MODULE=nextcloudappstore.settings.development
python manage.py runserver
The website is available at http://127.0.0.1:8000. Code changes will auto reload the server so happy developing! For more documentation on development, check out Store Development
Every time you start a new terminal session you will need to reactive the virtual environment and set the development settings:
poetry shell
export DJANGO_SETTINGS_MODULE=nextcloudappstore.settings.development
We therefore recommend creating a small bash alias in your ~/.bashrc:
alias cda='cd path/to/appstore && poetry shell && export DJANGO_SETTINGS_MODULE=nextcloudappstore.settings.development'
Keeping Up to Date
Note
Before updating it is recommended to stop the development server.
To check out the latest changes simply pull:
git pull --rebase origin master
then make sure that the virtual environment is enabled and install new libraries:
make update-dev-deps
apply new database migrations:
python manage.py migrate
and build the latest frontend:
yarn run build
IntelliJ IDEA Ultimate/PyCharm Setup
You can use any editor/IDE that you want to. However if you are already using IntelliJ IDEA Ultimate with the Python plugin or PyCharm you can import a fully installed project with the following steps:
Note
The configuration uses the Django Facet which is only included in the commercial IDE releases.
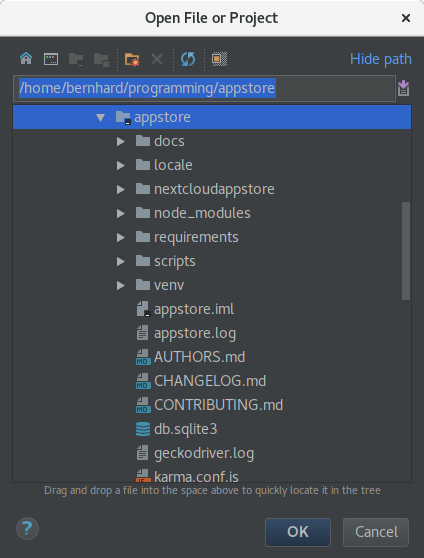
In the project window click Open and select the cloned appstore folder:
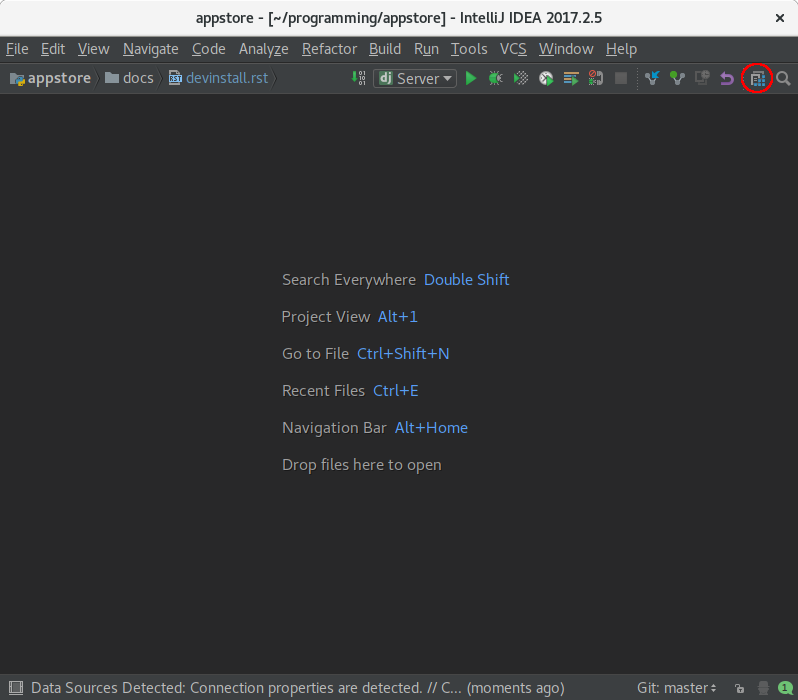
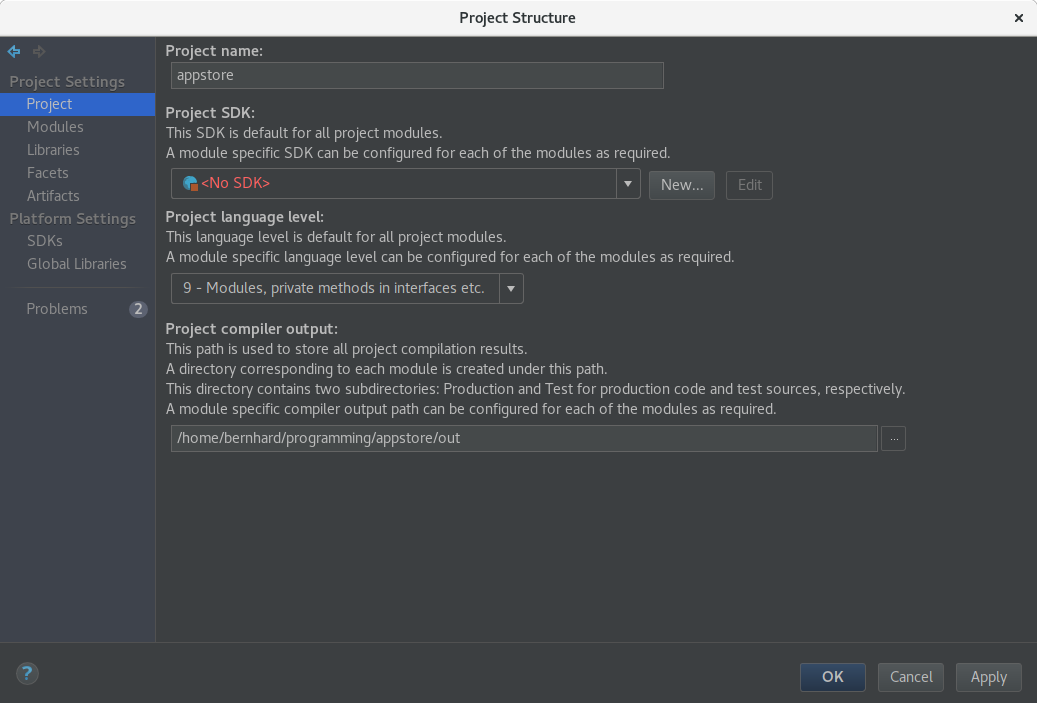
Afterwards you are presented with the main window. From here, click on the project settings icon:
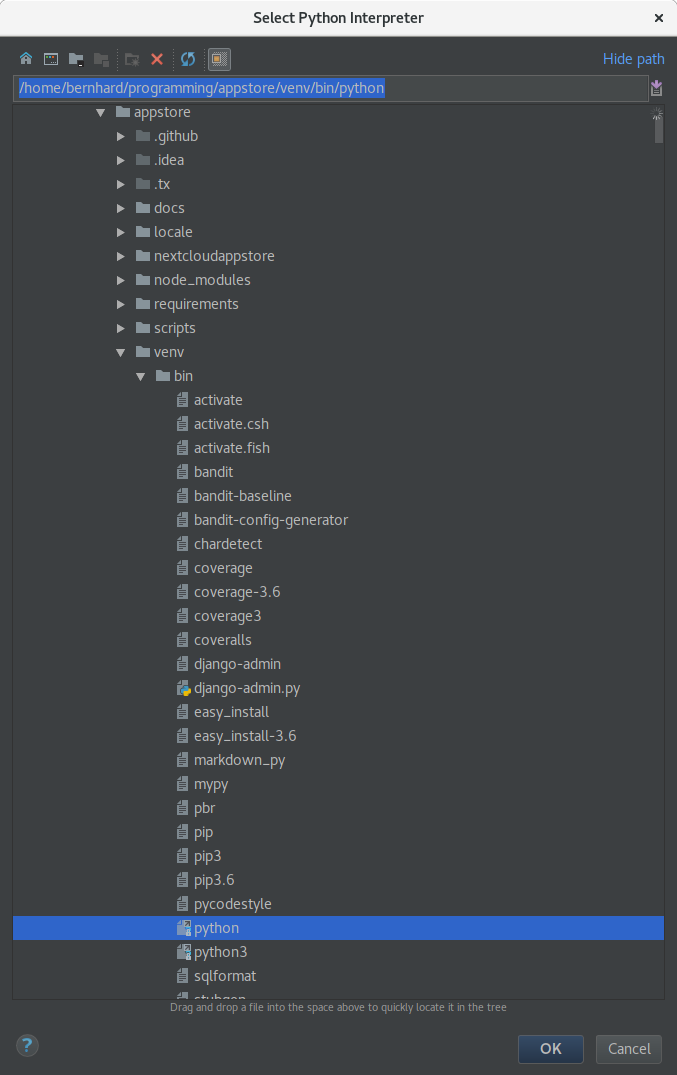
Then you need to add a new SDK. To do that click on New… -> Python SDK -> Add Local and select the Python executable venv/bin/python in your local venv folder:
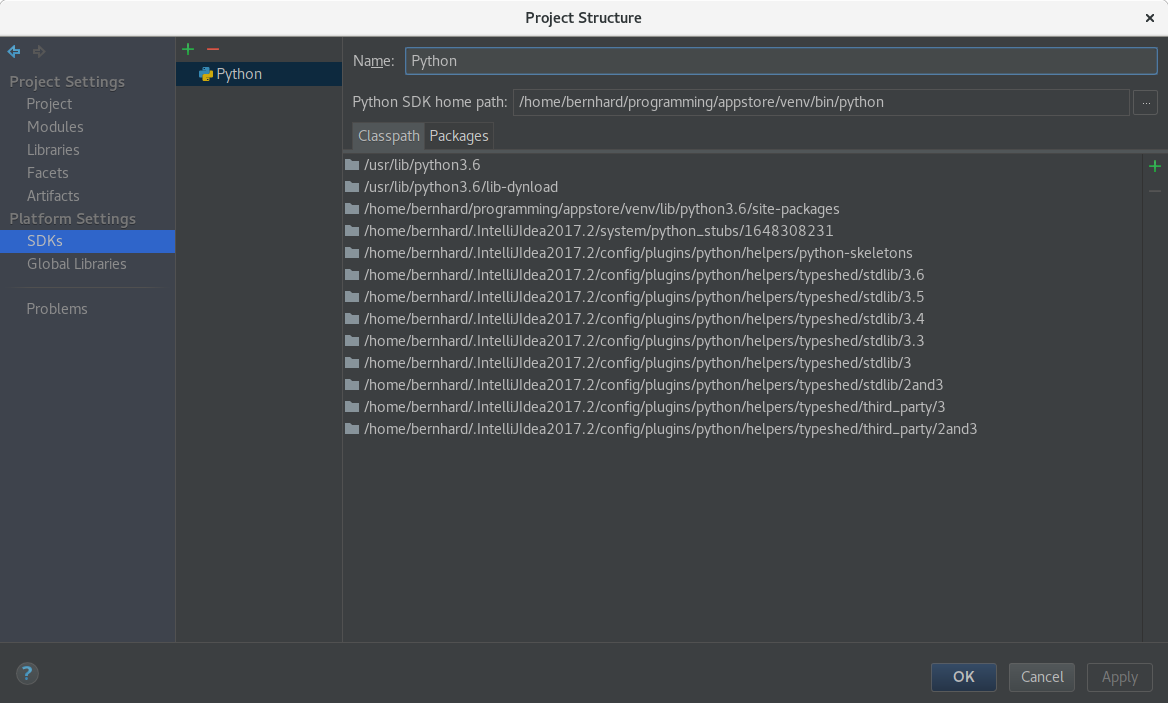
In your project settings go to SDKs and select your recently added Python SDK. Rename it to Python and close the project window by clicking OK.
You are now ready to start developing. You can start the server by choosing the run configuration Server and run all tests by selecting the run configuration Tests.
Note
Should you have issues with unrecognized imports just invalidate your caches by going to your global menu and clicking File -> Invalidate Caches / Restart -> Invalidate and Restart
IntelliJ IDEA Ultimate Specific Setup
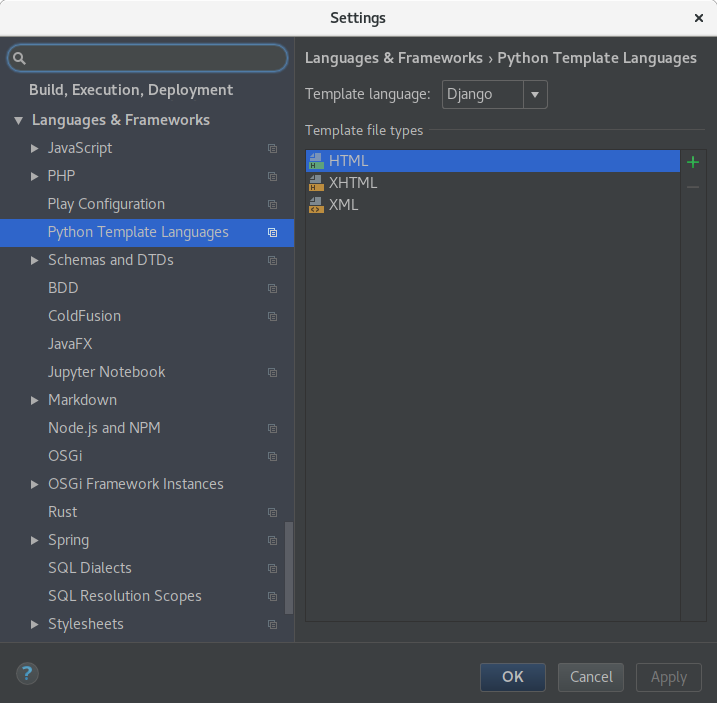
To enable support for Django templates, open your IDE settings by clicking File -> Settings. Then go to Languages and Frameworks -> Python Template Languages and select Django in the drop down menu on the right. Confirm your changes by clicking OK